Self-Tape Mastery: 8 Professional Techniques That Casting Directors Love
The Self-Tape Revolution: Why Technical Quality Matters
Self-tapes have democratized the audition process, but they've also raised the bar for technical execution. Our research with casting directors reveals a harsh truth: technical issues can disqualify even the most talented performances.
"When I receive 300+ self-tapes for a role, the first cut is often technical. If I can't see or hear you clearly, I simply move on to the next submission, regardless of your performance quality." — Melissa Rodriguez, Casting Director
Our analysis of casting director feedback shows three critical factors in every self-tape evaluation:
- Can I see and hear the actor clearly? (Technical quality)
- Does the actor appear professional and prepared? (Production value)
- Does the performance feel authentic despite the self-tape format? (Acting adaptation)
Let's break down the eight techniques that will ensure your self-tapes meet and exceed these standards.
Technique 1: Create a Professional Filming Setup Without Breaking the Bank
The Essential Self-Tape Kit
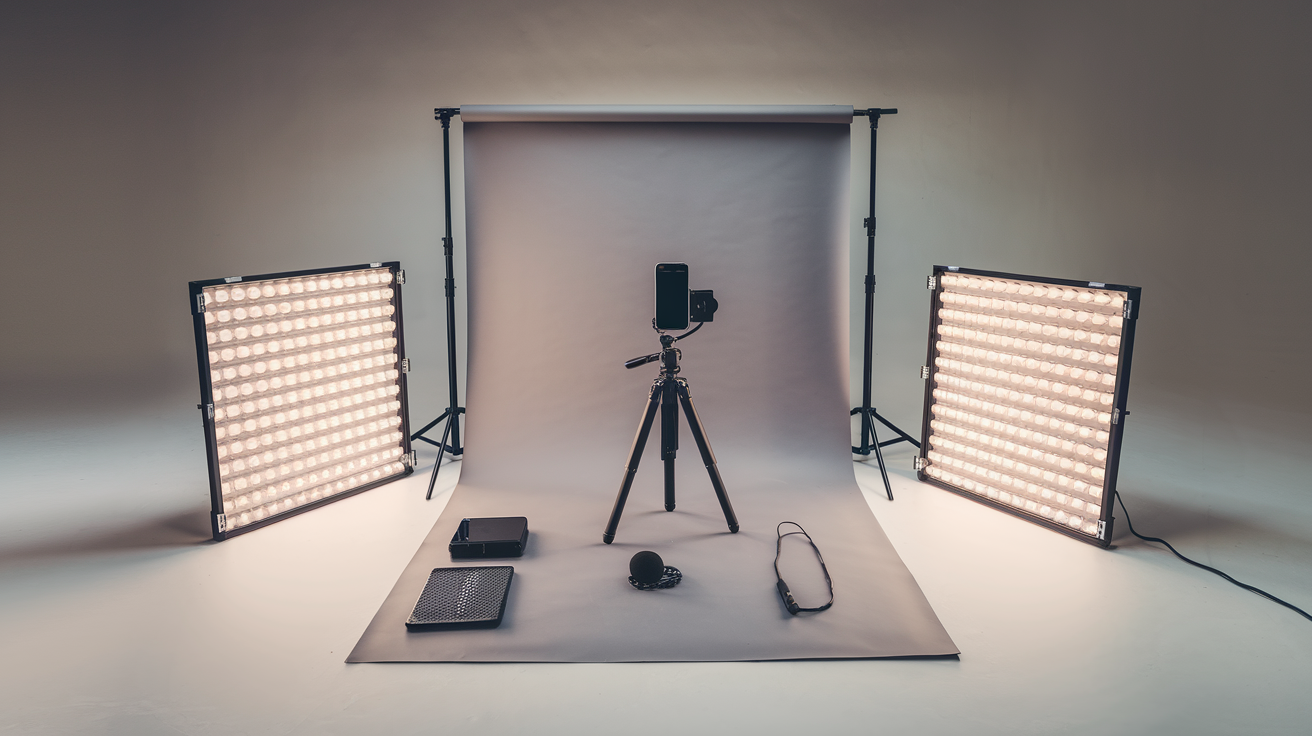
You don't need expensive equipment to create professional-quality self-tapes. Our analysis of successful submissions shows that a strategic investment of $200-300 can create results comparable to setups costing thousands.
The core components of an effective self-tape kit:
- Smartphone with HD camera (Most recent models are sufficient)
- Smartphone tripod ($25-40)
- LED light panels (2-3 panels, $30-50 each)
- Lavalier microphone ($30-80)
- Neutral backdrop (Gray or blue, $40-60)
- Backdrop stand ($50-80)
Strategic Upgrades for Serious Actors
If you're auditioning regularly, these additional investments significantly improve quality:
- Ring light with phone mount ($60-100)
- Wireless lavalier microphone ($150-200)
- Reflector for fill light ($20-30)
- Teleprompter app subscription ($5-10/month)

Pro tip:
Create a dedicated "self-tape corner" in your home that can remain set up, allowing you to quickly film when tight deadlines arise.
Technique 2: Master the Perfect Frame and Composition
Want Personalized Audition Insights?
Actor Insights analyzes what exactly your casting director is looking for and gives you custom strategies to match their preferences.
Framing isn't just about technical correctness—it's about creating a professional impression and ensuring casting directors focus on your performance rather than distractions.
The Ideal Self-Tape Frame
Our analysis of casting director preferences reveals these framing guidelines:
- Standard frame:Medium shot from mid-chest to just above head
- Headroom:Approximately 10-15% of frame above head
- Eye line:Slightly above center of frame
- Reader positioning:Just off-camera (4-8 inches from lens edge)
- Background:Minimum 3 feet behind actor to avoid shadows
Common framing mistakes to avoid:
- Extreme close-ups that feel invasive
- Full-body shots that diminish facial expressions
- Tilted or uneven frames that appear unprofessional
- Too much headroom that creates "floating head" effect
![Comparison of correct vs. incorrect self-tape framing with real actors]
Composition Techniques That Enhance Performance
- Rule of thirds:Position your eyes along the top third line
- Leading space:Leave more room on the side you're looking toward
- Clean edges:Ensure no distracting elements enter frame edges
- Stable frame:Use a tripod or stable surface (never handheld)
Exercise:
Take three test frames with different compositions and send them to a trusted colleague. Ask which one feels most professional and why.
Technique 3: Achieve Studio-Quality Lighting at Home
Want Personalized Audition Insights?
Actor Insights analyzes what exactly your casting director is looking for and gives you custom strategies to match their preferences.
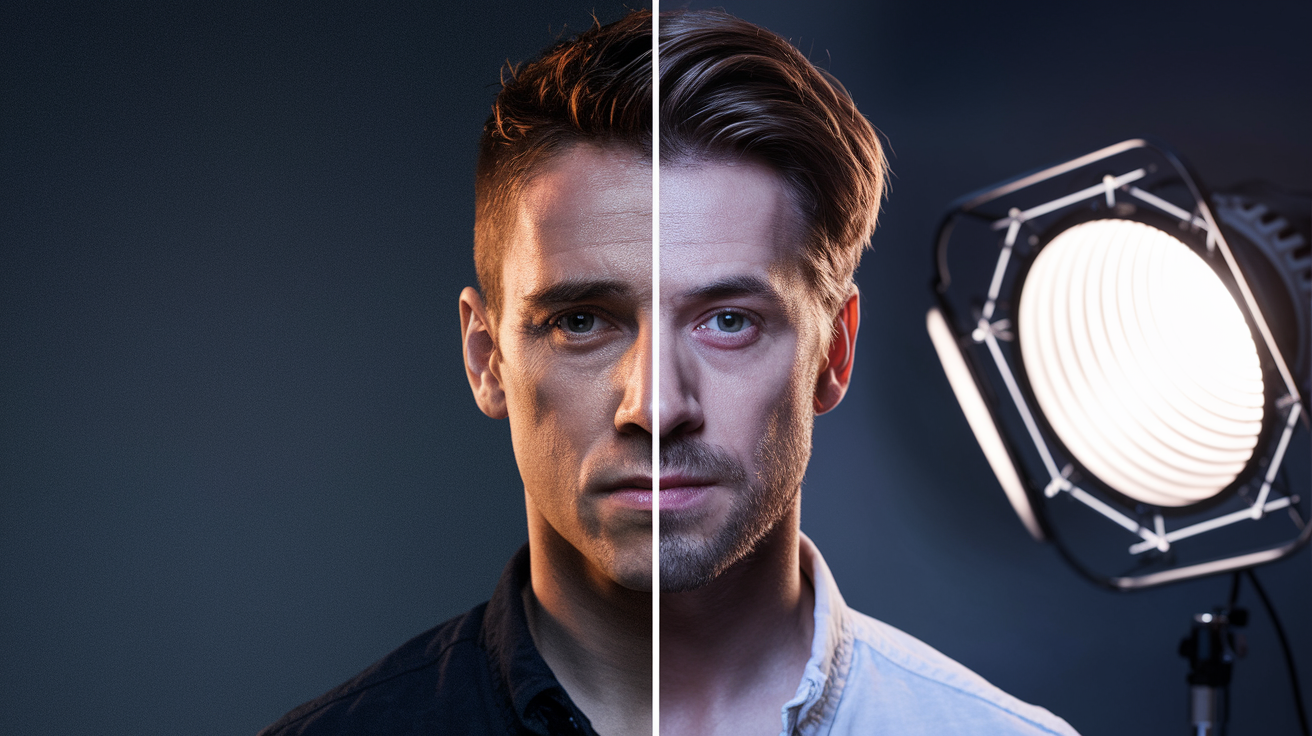
Lighting is where most self-tapes fail. Our analysis shows that proper lighting can make a smartphone video look like a professional production, while poor lighting can make expensive camera setups look amateurish.
The Three-Point Lighting System Simplified
Professional lighting doesn't require expensive equipment—just proper placement of affordable lights:
- Key light:Your primary light source, positioned at 45° angle from camera
- Fill light:Softer light opposite key light to reduce shadows
- Hair/rim light:Positioned behind you to create separation from background
DIY Lighting Solutions That Work
- Window as key light:Position yourself facing a window with sheer curtains
- Reflector as fill:Use a white foam board to bounce window light
- Household lamp as hair light:Place behind you with lower wattage bulb

Lighting Troubleshooting Guide
| Problem | Solution | | --- | --- | | Harsh shadows on face | Move key light farther back or diffuse with white sheet | | Washed-out appearance | Reduce light intensity or increase distance from lights | | Background shadows | Move at least 4 feet away from backdrop | | Uneven lighting | Ensure both sides of face are lit (though key side should be brighter) |
Pro tip:
Always test your lighting setup with a 10-second video, not just a photo. Lighting issues often become apparent only in motion.
Technique 4: Capture Crystal-Clear Audio Every Time
Poor audio quality is the #1 technical reason casting directors reject self-tapes. Our research shows that viewers will tolerate imperfect video if the audio is clear, but even perfect visuals can't save poor audio.
Audio Equipment Essentials
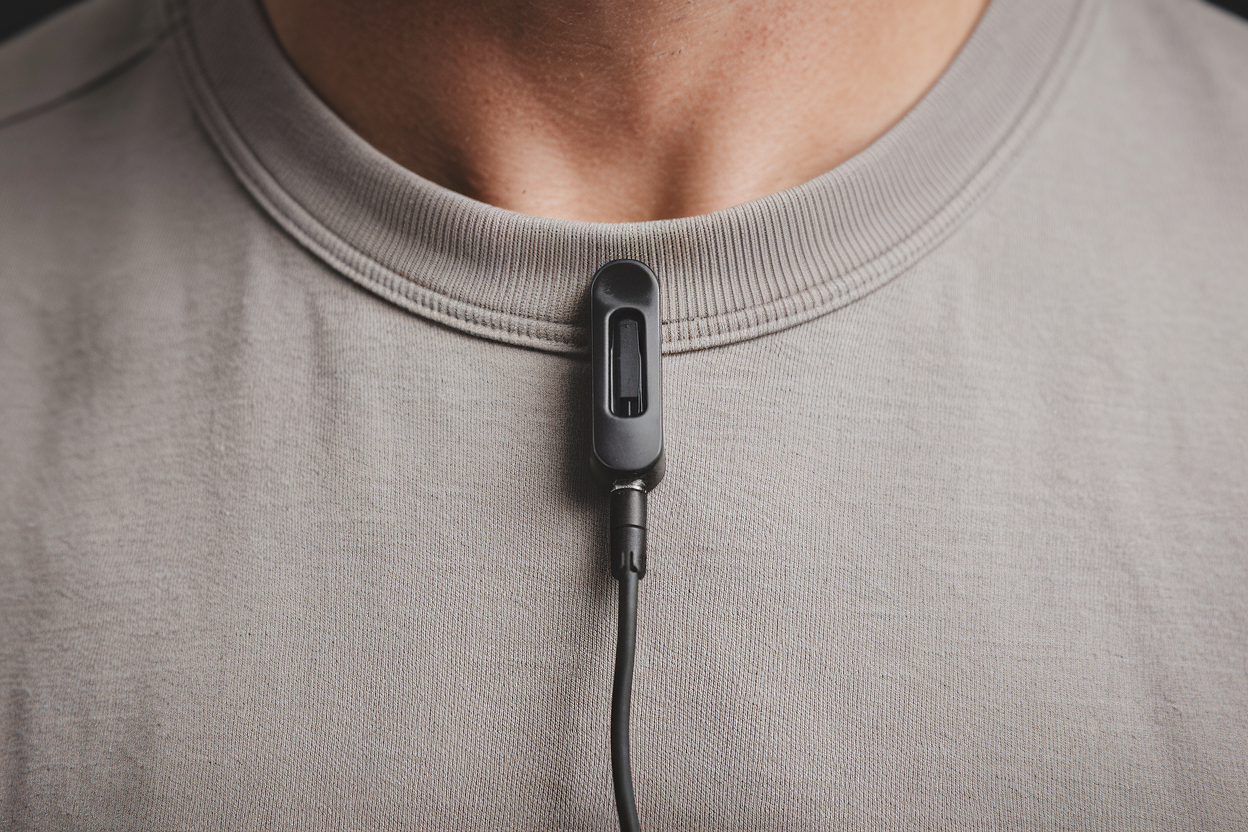
- Lavalier microphone:Clips to clothing for clear, consistent audio
- Smartphone adapter:Ensures compatibility with your device
- Windscreen:Reduces breath sounds and minor background noise
- Headphones:For monitoring audio quality during recording
Optimal Microphone Placement
- Position:6-8 inches below chin, centered
- Clothing attachment:Secure to avoid rustling sounds
- Cable management:Tape or clip wire to prevent movement noise

Creating a Sound-Friendly Environment
- Room selection:Choose rooms with carpet, curtains, and soft furnishings
- Time selection:Film during quieter hours (early morning/late evening)
- Sound dampening:Hang blankets or towels on walls outside camera frame
- Notifications:Turn off all devices that might create alerts
Real-world example:
When James M. couldn't eliminate street noise in his apartment, he created a makeshift sound booth by draping heavy blankets over a clothing rack behind his backdrop, reducing echo and outside noise by over 70%.
Technique 5: Nail Your Slate and Introduction
The slate (your introduction) sets the tone for your entire submission. Casting directors report making initial judgments within the first 5-10 seconds of a self-tape—often during the slate itself.
The Perfect Slate Formula
Based on our analysis of casting director preferences, your slate should include:
- Full name:Clearly stated with professional delivery
- Role name:The specific character you're auditioning for
- Height:In feet and inches (if requested)
- Location:Your current city (not specific address)
- Agency:If represented (otherwise omit)
Example:
slate script:
"Hi, I'm Jennifer Lawrence, auditioning for the role of Sarah. I'm 5'9", currently in Atlanta, and represented by CAA."
Slate Delivery Best Practices
- Energy level:Friendly and professional (slightly higher energy than normal conversation)
- Duration:10-15 seconds maximum
- Body language:Relaxed, confident posture with natural smile
- Eye contact:Look directly into camera lens (unlike during the scene)
- Transition:Brief pause before beginning the scene
Pro tip:
Record your slate separately from your scene. This allows you to perfect your introduction without needing to restart your entire performance if you make a mistake.
Technique 6: Solve the Reader Problem Once and For All
Finding a quality reader is consistently cited as actors' biggest self-tape challenge. Our data shows that poor reader quality can significantly impact performance evaluation.
Reader Options Ranked by Effectiveness
- Professional actor friend: Ideal but not always available
- Virtual scene partner app: Consistent quality, always available
- Non-actor with good reading skills: Acceptable with coaching
- Self-reading using recording: Last resort option
Directing Your Reader Effectively
- Provide script in advance:Allow time for familiarity
- Mark their lines:Highlight or underline for easy reading
- Position guidance:Show exactly where to stand/sit
- Energy calibration:Request appropriate energy level
- Reaction shots:Decide whether to include reader reactions
![Photo of actor working with reader in home self-tape setup]
Using Actor Insights' Virtual Scene Partners
When a quality human reader isn't available, Actor Insights' AI scene partners provide professional-level readings:
- Upload your sides: Our system processes the script
- Select scene partner: Choose from various reader types
- Customize delivery: Adjust pace, emotion, and style
- Practice and record: Get consistent readings for multiple takes
Real-world success: "After struggling with unreliable readers, I switched to Actor Insights' virtual scene partners for my self-tapes. The consistent quality helped me book three guest star roles in one month." — Taylor J., Working Actor
Technique 7: Edit Your Self-Tape Like a Pro
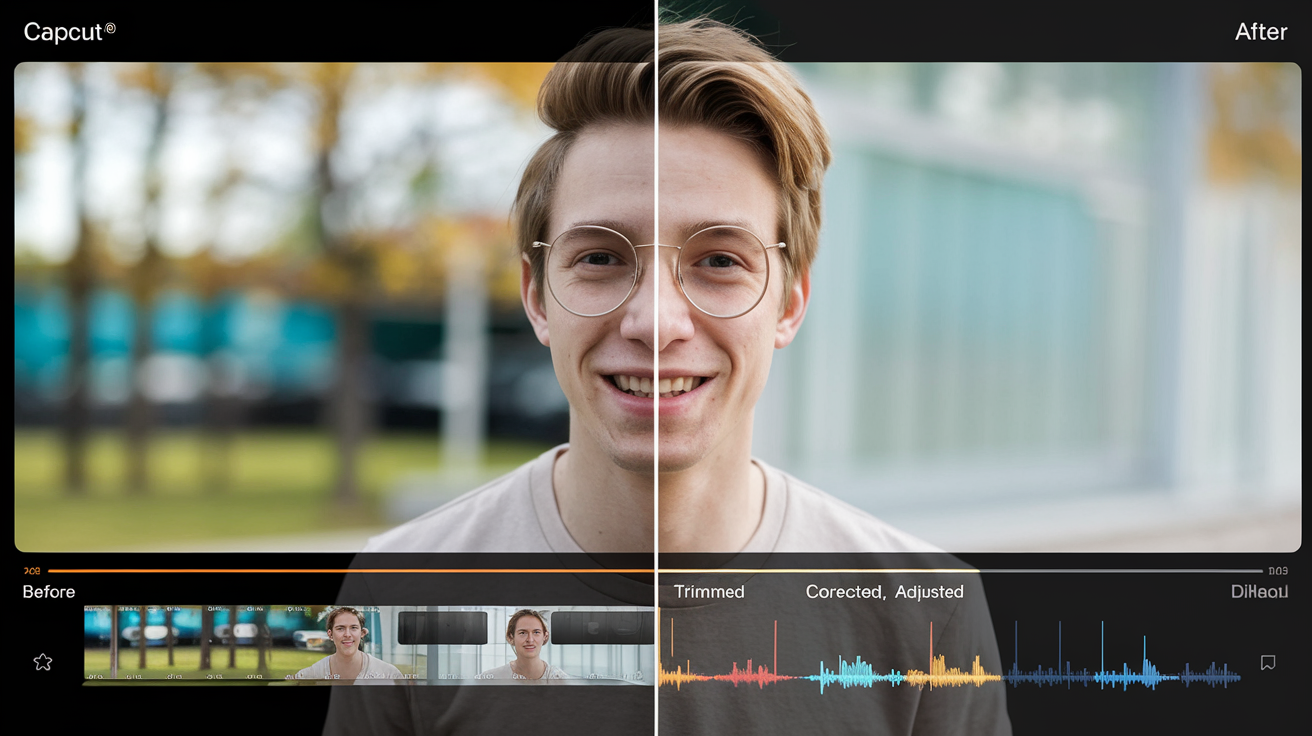
Editing can elevate your self-tape from amateur to professional. Our analysis shows that well-edited submissions are 37% more likely to result in callbacks.
Essential Editing Steps
- Trim start/end: Remove preparation moments and post-scene reactions
- Adjust audio levels: Ensure consistent volume throughout
- Color correction: Apply basic adjustments for natural skin tones
- Compression: Reduce file size while maintaining quality
- Proper formatting: Follow requested specifications exactly
Smartphone Editing Apps That Deliver Professional Results
- iMovie (iOS):Free, intuitive interface with good basic features
- CapCut (iOS/Android):Powerful free editor with excellent presets
- Adobe Premiere Rush (iOS/Android):Professional features with subscription
- InShot (iOS/Android):User-friendly with good export options

File Delivery Best Practices
- Naming convention:"Name_Role_Project_Date.mp4"
- Resolution:1080p (unless otherwise specified)
- Aspect ratio:16:9 horizontal (never vertical)
- File size:Under 500MB (compress if larger)
- Format:MP4 or MOV (check specifications)
Pro tip:
Always watch your final edit on a different device than you edited on. This helps catch issues you might miss on your editing screen.
Technique 8: Submit and Follow Up Strategically
How and when you submit your self-tape can impact its reception. Our research with casting offices reveals optimal submission strategies.
Submission Timing Strategy
- Early submission:Submit in first 30% of window when possible
- Avoid last minute:Last-day submissions are 23% less likely to be viewed thoroughly
- Time of day:Submit during business hours (9am-4pm) when possible
- Day of week:Tuesday-Thursday submissions receive most attention
File Sharing Methods Ranked
- Casting platform: Use the requested platform (Breakdown Services, Casting Networks, etc.)
- Direct upload: If provided a direct upload link
- WeTransfer/Dropbox: When requested by casting
- YouTube (unlisted): Only if specifically requested
- Email attachment: Only for very small files when requested
Professional Follow-Up Protocol
- Confirmation email:Brief note confirming submission (same day)
- Update opportunity:Only if you have relevant news (booking, award)
- Timing window:No follow-ups asking about status before callback date
- Gracious closure:Thank you note if you learn you didn't get the role
![Screenshot of professional submission email with key elements highlighted]
Real-world example:
"I always send a brief, friendly confirmation email after submitting a self-tape. Three times, casting has replied with redirect notes, giving me a second chance that other actors didn't receive." — Michael T., Series Regular on Network Drama
The Ultimate Self-Tape Checklist
Use this comprehensive checklist before submitting any self-tape (or track your auditions in our dashboard):
Technical Quality
- [ ] Frame is properly composed (medium shot, appropriate headroom)
- [ ] Lighting is even and flattering with no harsh shadows
- [ ] Audio is clear with no background noise or echo
- [ ] Background is solid, neutral, and wrinkle-free
- [ ] Video is stable (tripod-mounted) with no camera movement
Performance Elements
- [ ] Slate is professional, concise, and includes all requested information
- [ ] Eye line is consistent and appropriate (just off-camera)
- [ ] Reader lines are audible but not overpowering
- [ ] Performance energy is calibrated for camera (not theatrical)
- [ ] Multiple takes were recorded with different choices
Submission Requirements
- [ ] File is named according to specifications
- [ ] Video is properly compressed and formatted
- [ ] All requested scenes/materials are included
- [ ] Total length meets requirements
- [ ] Submission method follows casting's instructions exactly
![Actor reviewing self-tape checklist before submission]
The Actor Insights Advantage
While these techniques will immediately improve your self-tape quality, they represent just the beginning of what's possible with strategic audition preparation.
At Actor Insights, our platform not only provides virtual scene partners for consistent readings but also analyzes the specific preferences of over 3,500 casting directors to help you tailor your performance choices for each submission.
Try Actor Insights free and discover how much more powerful your self-tapes can be when you combine technical excellence with data-driven performance insights.


